The Instant Outline Tool for the OPML Editor allows a group of people to communicate using an outline to reflect each person's status. You have two windows -- one where you edit your outline, and the other where you view the outlines of all your buddies, the members of your workgroup.
The format of the outline is entirely up to each person, however there are conventions suggested by the tool -- but these just serve to help bootstrap the workgroup. Once you're up and running, you can use the flexibility of the outliner to organize any way that works for you. This can be a mixed blessing, so use the power carefully, too much innovation can distract from the work you're trying to do.
But if you make the investment, it's proven to be a very effective tool for managing groups of people collaborationg over the globe. For background here are a couple of pieces that explain the philosophy of workgroup outliners.
Changes on 2/5/09
1. The beta group is now public, it was private before.
Prerequesites
Before getting started, there are two prerequisites.
3. Bring the OPML Editor app to the front. Choose Tool Catalog from the Misc menu. Click on the Install link for the instantOutline tool. A dialog appears confirming that you want to install the Tool, click OK.
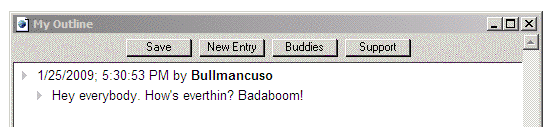
4. The My Outline window opens when the Tool is finished installing. There are four buttons: Save, New Entry, Buddies and Support.
Click on New Entry to open a new outline entry, a place for you to type.
When you want to communicate the contents of your outline to your buddies, click Save. It's first because it's the most oft-used command.
The Buddies window automatically opens the first time a buddy updates, but if you close it or want to bring it to the front, you can click on the Buddies button.
The Support button opens this page. There's a comment box at the bottom of the page to enter a question or report a problem.
Using the Instant Outliner
When one of your buddies updates his or her name will bolden in the Buddies window. Double-click to expand. If it's already expanded, double-click twice to see their latest update.
When you want to update, click My Outline and then New Entry. Type in your status update (no limit of 140 characters, and you can indent and add as many items as you like). When you're ready to update, click Save. You can change edit and reorganize as much as you like, when you're ready to show the changes to the members of your workgroup click Save.
Why FriendFeed?
We're using FriendFeed for part of the back-end of the Instant Outliner because it's easy to set up, it has a simple realtime API, it's reliable, and its "rooms" structure is a natural fit for workgroup outlines.
Using more than one computer
You can use the Instant Outliner on more than one computer.
If you use it on another machine that has an older version of the outline than the already-published one, you'll get a dialog offering to let you either: 1. Use the public outline. 2. Continue with the older one, or.. 3. Cancel so you can think about it a bit.
Probably the first choice is the correct one.
Switching to a new group
An Instant Outline workgroup is implemented as a FriendFeed room. If you want your group to be private then make your room private. If it's public, then the group will be public.
You can switch to a different room using the Change room command in the Instant Outline sub-menu of the Tools menu. Or you can change rooms using a web interface.
The fictitious mob enforcer Bull Mancuso created a new group for everyone to switch to called Bull's Shed. To do do, first join the room, then click on the picture of the bull to the right while the OPML Editor is running on your computer. If everything goes as planned, the editor should come to the front and a dialog should appear asking if you want to switch to the new room. If you do, click on OK.
The new room functions exactly as the original one did. With this change, the bootstrap of the Instant Outliner advances to the next stage. Anyone can use it. And after a bit of practice you'll be able to start your own rooms for your own projects or workgroups. We're still going at a glacially slow speed, so don't expect it to take off at once, one step at a time, slowly...
Note: If you want to switch back to the private group, click here and cross your fingers.
Sending to Twitter
Maybe you've entered something in your My Outline window and want to send it to your Twitter followers? Here's how.
1. The first time you do it, make sure you've entered your Twitter username and password in the prefs page. This info is stored on your computer and transmitted with your posts to Twitter.
2. Put the outline cursor on the headline with the text you want to send.
3. Right-click.
4. Choose Send To Twitter from the popup menu.
5. A dialog confirms you want to send it to Twitter. Click OK.
If the line contains a URL it is shortened by bit.ly before sending.
Code updates
As of February 2009, this tool is in active development -- that means most weeks there are new features and fixes. The tool is set up to update itself every hour at the top of the hour. However the editor must be running for the update to happen.
If you ever feel that the code has gotten out of synch, you can do a complete update as follows:
1. Launch the OPML Editor.
2. Choose Tool Catalog from the Misc menu.
3. Click on the Install link for instantOutline.
4. Two confirmations will appear, one to confirm that you want to install, and the second to confirm that you want to replace the existing instantOutline.root. Click OK to both.
If you don't want to wait until the top of the hour to get updates (for example you've seen an announcement of new features and want to try them immediately), you can update manually as follows.
1. Choose instantOutline.root from the Window menu.
2. Choose Update Front Tool from the Tools menu.
3. Click OK to confirm.
4. When the update is done, choose Save from the File menu with instantOutline.root in front.